# 历史版本镜像
GitLab历史版本镜像指10.1.0版本之前的版本,例如8.9.6。历史版本使用的Bitnami提供的GitLab安装包,配置文件路径是使用方式均有不同,请认真阅读如下不同之处。
Bitnami GitLab官方说明文档请参考:
## [镜像组成](/gitlab-image-guide/gitlab-jing-xiang-shou-ce-1/li-shi-ban-ben-jing-xiang.md#1401)
软件版本:Git 2.7.4、Gitlab8.9.6 环境软件:Apache 2.4.23、PostgreSQL 9.5.3、Ruby 2.1.9、Rails 4.2.5.1、RubyGems 1.8.12、ImageMagick 6.7.5 集成软件目录:/data/gitlab-8.9.6 Apache 默认配置目录:/data/gitlab-8.9.6/apache2/conf/ Gitlab目录:/data/gitlab-8.9.6/apps/gitlab
## [默认账号](/gitlab-image-guide/gitlab-jing-xiang-shou-ce-1/li-shi-ban-ben-jing-xiang.md#1402)
GitLab8.9.6版本默认管理员/密码:websoft9/admin123
## [重启服务命令](/gitlab-image-guide/gitlab-jing-xiang-shou-ce-1/li-shi-ban-ben-jing-xiang.md#1403)
Putty到服务器,执行红色命令,重启需要1分钟左右,请耐心等待: *\*\** \[root\@iZ94bojtvkpZ plone-5.0.2]# cd /data/gitlab-8.9.6 \[root\@iZ94bojtvkpZ plone-5.0.2]# ./ctlscript.sh restart
## [修改IP路由](/gitlab-image-guide/gitlab-jing-xiang-shou-ce-1/li-shi-ban-ben-jing-xiang.md#1404)
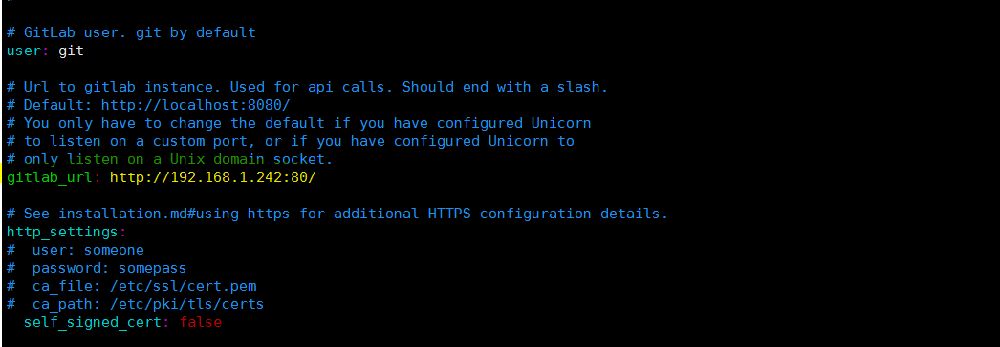
找到gitlab-shell下的config.yml文件,将其中的gitlab\_url修改一为您当前服务器的公网IP
## [域名配置](/gitlab-image-guide/gitlab-jing-xiang-shou-ce-1/li-shi-ban-ben-jing-xiang.md#1405)
**域名配置:\*\***请[远程登录到后台服务器](http://jingyan.baidu.com/article/e73e26c0eb063324adb6a737.html),打开/data/gitlab-8.9.6/apps/gitlab/htdocs/config/gitlab.yml文件,搜索test.websoft9.cn替换成您的域名(修改前建议先备份),有两处位置:\*\* … … gitlab: ## Web server settings (note: host is the FQDN, do not include http\://) host: test.websoft9.cn port: 80 # Set to 443 if using HTTPS, see installation.md#using-https for additional HTTPS configuration details https: false # Set to true if using HTTPS, see installation.md#using-https for additional HTTPS configuration details … … gitlab: host: test.websoft9.cn port: 80 … …
---
# Agent Instructions: Querying This Documentation
If you need additional information that is not directly available in this page, you can query the documentation dynamically by asking a question.
Perform an HTTP GET request on the current page URL with the `ask` query parameter:
```
GET https://websoft9.gitbook.io/gitlab-image-guide/gitlab-jing-xiang-shou-ce-1/li-shi-ban-ben-jing-xiang.md?ask=
```
The question should be specific, self-contained, and written in natural language.
The response will contain a direct answer to the question and relevant excerpts and sources from the documentation.
Use this mechanism when the answer is not explicitly present in the current page, you need clarification or additional context, or you want to retrieve related documentation sections.